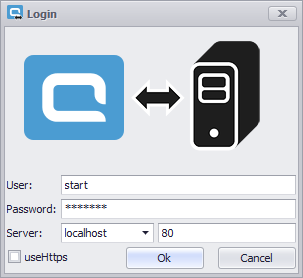
First, you should start aquaSyncConfigurator and log in as an aqua Administrator. You will see the following window:
Here, the user needs to type in his aqua user name and password followed by the name of the aqua server. Then, click Ok.
The next window is the tools main menu. A detailed explanation of this menu can be found in the chapter Main Menu. For now, we will skip this and click on the upper-right button called New Sync.
The next window will lead you to the first wizard step called “Creating a new sync”. Here, the wizard automatically recognizes which type of synchronization the user wishes to use. In our case, the type “Jira Rest" will be selected. Click Next >to proceed to the next step.
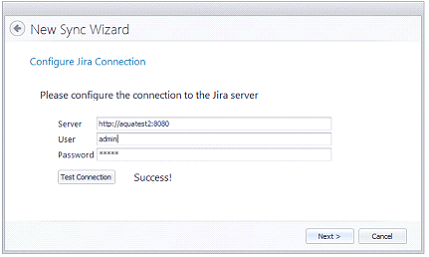
In this step, the wizard is asking for the information needed to establish a connection to the Jira server. Please enter the complete http address with ports. In the fields User and Password, please enter your Jira administrator login data.
Before going to the next step, please click on Test Connection. The wizard will immediately test whether the connection can be made with the given account data. After receiving the notification “Success!”, click on Next >.
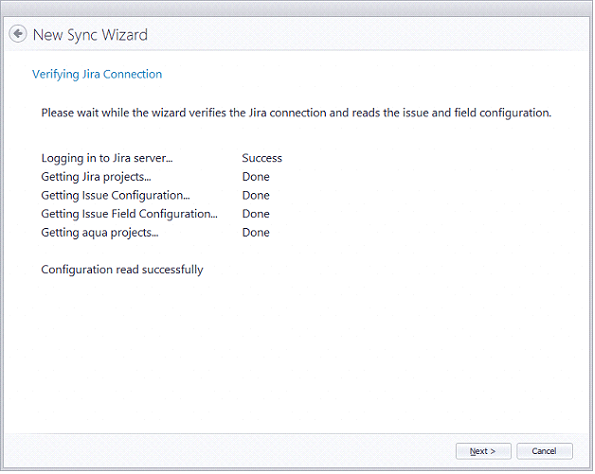
The next step called “Verifying Jira Connection” is a verification step to inform the user that the wizard has all the information it needs. After receiving a successful verification click on Next >.